Guide for Mobile Devices
A guide for your mobile timesheet software on iPad, iPhone and Android phones and tablets.
The mobile version of Senomix Timesheets can be used with your Android, iPhone, iPad, or other current handheld device. System screens will be resized to accommodate your device or computer's screen size, with available space and displayed timesheet columns varying according to your device's specifications.
For simplicity in this guide, all screens after this section will be shown as they appear on an iPad tablet computer. The functionality provided on other devices will be the same as that shown for the iPad, with layouts changed to suit the screen space available to you.
For example, a timesheet will appear as follows on an Apple iPad:
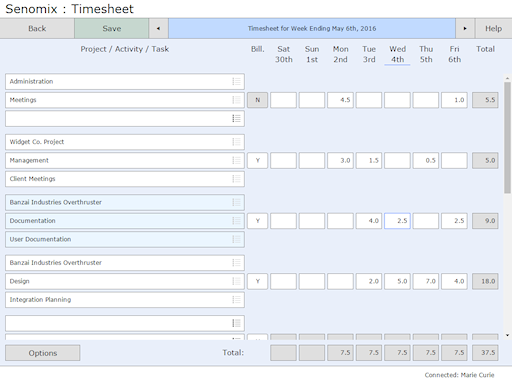
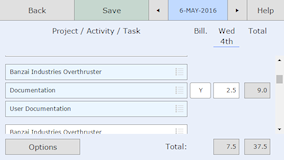
The header and footer elements on each screen can be shown or hidden with a double-tap to your device's background. This can be helpful for smaller screens, such as the Apple iPhone 5, which is shown here with the header and footer temporarily hidden for ease of use:
Screens can be displayed in both Landscape and Portrait orientation for your iPad, iPhone or Android device. For example, the timesheet shown above will appear as follows on iPad when rotated to Portrait mode:
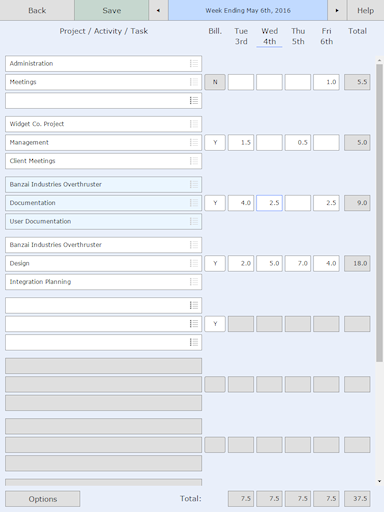
You'll find that some devices only have enough screen space available to display a few of the days on a timesheet week. In the examples above, the iPad in portrait mode shows four of the seven days of the week, and the iPhone can display only a single day's column. For both screens, the hidden day columns can be viewed by swiping your device screen left or right in order to change the column of focus.
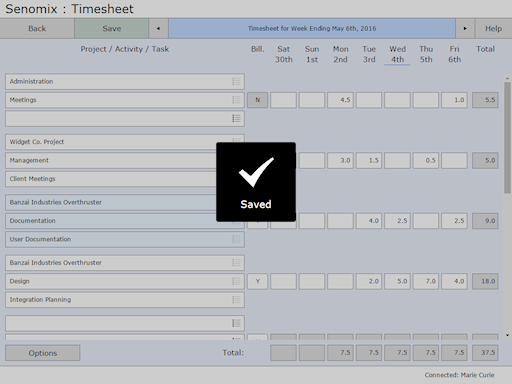
Whenever your app needs you to wait while it communicates with your server, a wait spinner will be displayed in the middle of your screen. Similarly, when your app has completed a save action, it will inform you of the save success with an on-screen checkmark:
To dismiss that confirmation checkmark, just tap your device's screen.
The mobile app login process for Senomix is much the same as for your desktop applications. Each user connects with their assigned email and password
If you have any questions about signing in to your Senomix account from your mobile device, please contact us at support@senomix.com. We'll be happy to help!
Modern phones and tablets are miniature computers and, like all computers,
can become unstable if left powered on without rebooting for long periods of time.
If you find your phone or tablet is becoming unstable
please take a moment to clear your device's memory by fully powering off
and rebooting your device.
You can power off your phone or tablet by holding your device's power button
for five seconds and following the instructions which appear on-screen.
Once you have signed in to your Senomix app you will be brought to your Main Menu:
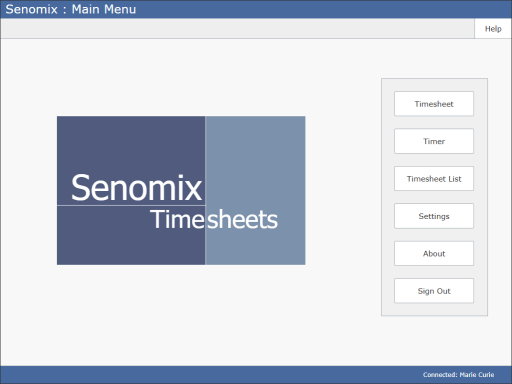
To open a system screen, just tap a button to make your selection.
To sign out and exit your Senomix app you can tap the main menu Sign Out button or close your application from any system screen.
Your mobile app's timesheet behaves much like the screen used in your desktop system and we'll only provide an overview of that functionality here. For a detailed description of the options available for your timesheet, please see the tutorial and help pages provided with your desktop apps.
A timesheet opened from the Timesheet button on your main menu will always bring you to your current week's timesheet:
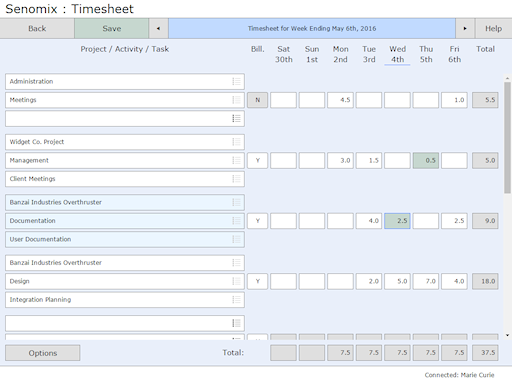
To view a timesheet for a past or future week you can click the toolbar arrow buttons to change your week of focus, or open the Timesheet Listing screen to review all of your records.
To view days of the week scrolled off-screen, just swipe your iPad, iPhone or Android device's screen to the left or right as appropriate to shift your field of view.
To select a project, activity or task for your timesheet, tap one of the selector fields at the left-hand side of your timesheet row. The selector for project, activity or task will be opened as appropriate for your choice.
For example, if the task field of the project/activity/task selector on the third timesheet row shown above was tapped, the selector screen would be opened to allow you to change your selected task:
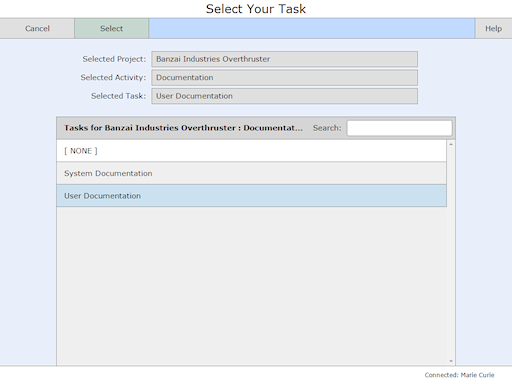
The currently selected project, activity and task are shown at the top of your screen, with the available options displayed in the table below.
To select the project, activity and task displayed for your choice and set it for your current timesheet's row, tap the green Select button. To cancel any change of selection, click the Cancel toolbar button.
To select a different project, activity or task, just tap the row of interest to you and hold it for a moment.
After selecting an item, your timesheet row will be updated to reflect your choice. For example, if the "System Documentation" task was chosen for row of the timesheet selected above, the row would be updated as follows:
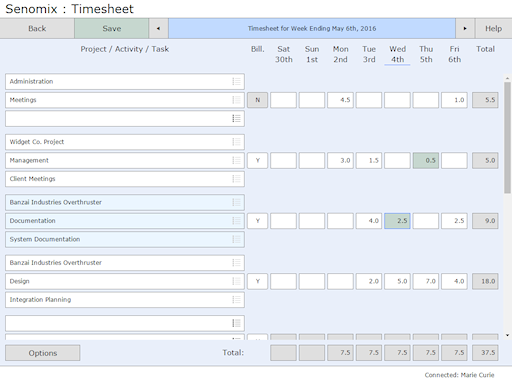
As with the desktop version of Senomix Timesheets, you can set your timesheet rows to have a project, activity or task level of precision for your selection, with the "None" option allowing you to indicate a blank selection for your choice. For example, on the first timesheet row shown above, only a project and activity have been chosen to reflect the non-billable work for Meetings.
To enter an hours value in your timesheet, just tap the hours field of interest to you and enter the number of hours you wish to record. By default, a decimal will automatically be added after the first number you have typed, so the value "3.5" can be entered by simply typing the numbers "3" and "5" on your keyboard.
If you would prefer to type the decimal yourself when entering your hours, the automatic decimal option can be disabled in your Settings screen.
To save your timesheet, tap the green "Save" button on your screen's toolbar. Once your record has been saved, a confirming checkmark will be shown:
You can dismiss that checkmark and continue your work by tapping your screen.
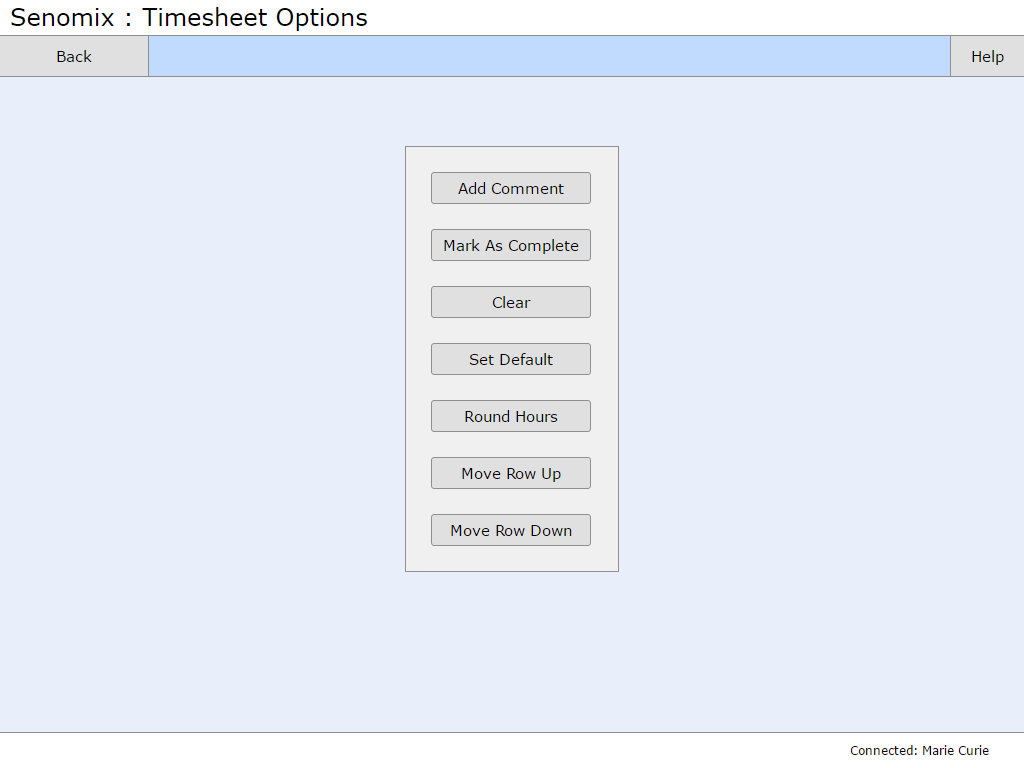
The Options button at the bottom-left corner of your timesheet screen provides access to the other options available in your desktop apps. For example, if tapping that button on an editable timesheet, you would be presented with this menu:
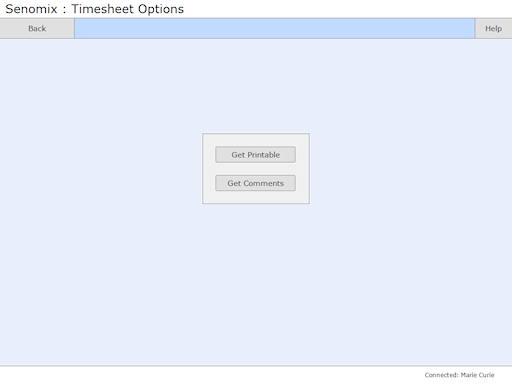
Similarly, tapping the Options button from a read-only timesheet would provide you with the options made available in your desktop app's read-only timesheet screen:
The Clear, Mark As Complete, Round Hours, Move Row Up and Move Row Down buttons provide the same functionality as your desktop apps to clear your screen, submit your timesheet for approval, round timesheet hours to the nearest 5, 10, 15 or 30 minutes (as set by your system administrator), and to move your selected timesheet row up or down in the timesheet grid. The functionality provided by the other buttons in this menu are described below.
To attach a text comment to any effort hours entry, tap the "Add Comment" button from your timesheet options. A comment entry screen will then be displayed corresponding to the timesheet hours field you last tapped:
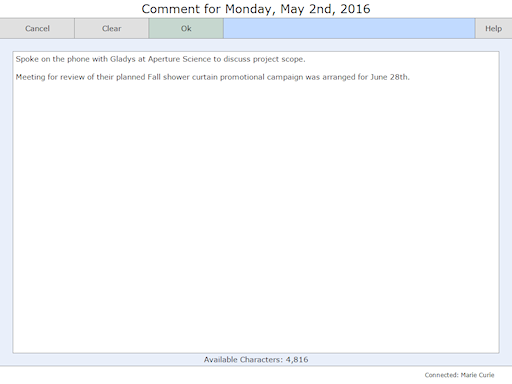
As with your desktop system, you can attach up to 5,000 characters of comment text to each of your timesheet hours entries and can also use the voice notes option of your iPad, iPhone or Android device to dictate your comment.
To attach an entered comment to your timesheet, tap the green "Ok" button. As with your desktop system, the hours entry field will then be shaded a light green colour to indicate that a comment has been added to those hours.
You can view your entered comment by either setting focus to the hours field of interest and opening your edit comment screen or by creating a "Timesheet Comments" report (as described below).
To save a default template for your timesheet (so, record your timesheet row selected projects, activities, tasks and billable / non-billable states), tap the "Set Default" button from your timesheet options. A confirmation checkmark will be shown to inform you that your defaults have been set to reflect the displayed timesheet:
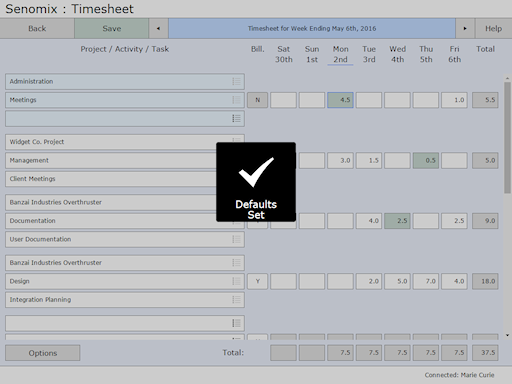
As with your desktop system, your defaults will then be pre-populated the next time you open a new timesheet for your work week.
To clear your defaults, just clear your timesheet (by tapping the "Clear" button from your timesheet options) and set the default timesheet again for that cleared screen by tapping the "Set Default" button.
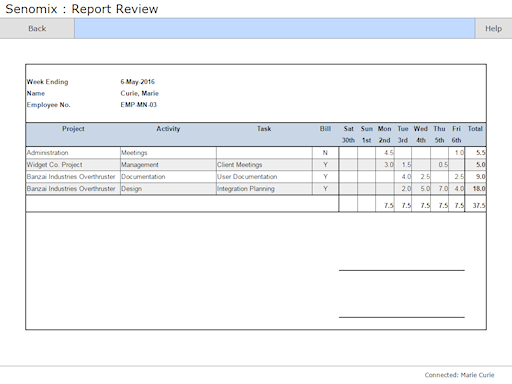
To create a print-ready timesheet, tap the "Get Printable" button on your read-only timesheet options menu:
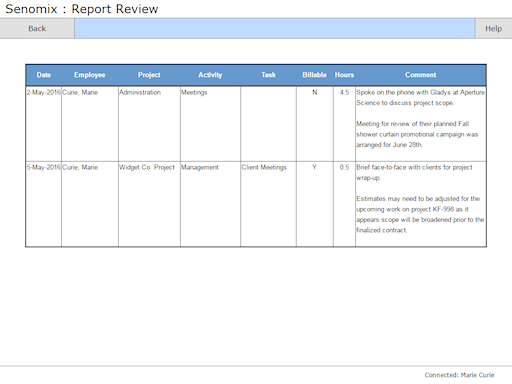
As with the printable timesheet, you can create a timesheet comments report by tapping the "Get Comments" button on your read-only timesheet options:
The Timesheet Listing screen allows you to review all of your past timesheets and open those records for review or editing:
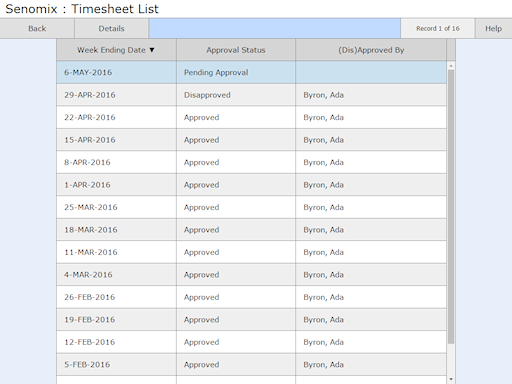
In the listing screen, you can see if your past record is pending approval (and so can still be edited), has been approved and locked from editing, or has been disapproved for correction. The name of the individual who has approved or disapproved your timesheet can also be seen in that record's row.
To select a timesheet for review, tap row of interest and either hold your finger on that selection or tap the Details toolbar button. Once selected, your timesheet will be opened as a read-only timesheet:
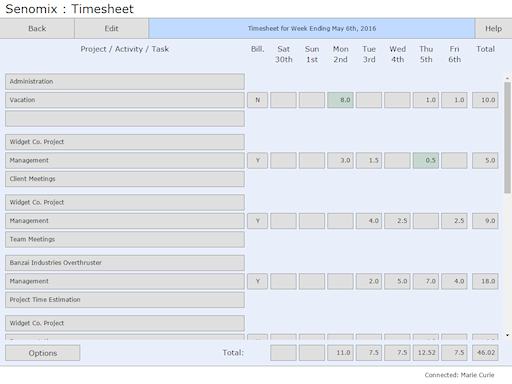
The read-only timesheet holds the same information as your regular, editable timesheet, with the Save button replaced with an Edit option.
If your reviewed timesheet has been approved and locked from editing, the Edit button will read "Locked".
If your timesheet is still available for editing you can tap the Edit toolbar button to allow adjustments to your record.
Your Settings screen allows you to set your personal preferences for your Senomix app.
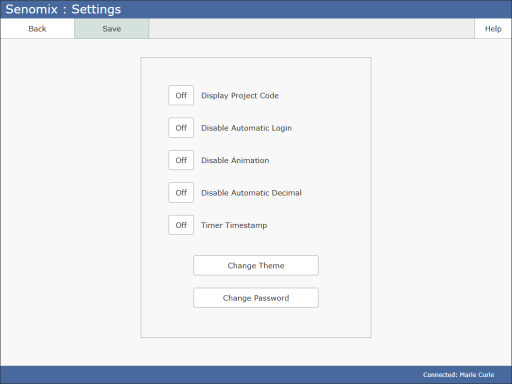
Each of the options can be set on and off using the listed toggle switches. To apply your changes, tap the Save toolbar button.
The settings options available are:
As with your desktop system, you can set your project selector and timesheet to display the project code for your available projects and show that identifier on your timesheet screen. If you have chosen to display project codes for your projects, your records will be listed alphabetically in order of project code rather than by project description.
By default, your Senomix app is set to automatically connect to your account when you open your mobile sign-in screen. If you would prefer instead to enter your password manually and not have your password saved for your device, just set this option on and you will be left at your sign-in screen to provide that information on each system login.
If you would prefer that your Senomix application screens change immediately rather than with a smooth transition animation, just set this preference to Yes.
Your Senomix app is set to automatically add a decimal to your hours entries. If you would prefer to enter your decimal manually, just enable this option to remove the use of an automatic decimal from your time entry screen.
When set, a timestamp will be applied to your timesheet entries whenever your automatic timer is started or stopped.
Opens your theme selector, allowing you to change your mobile app's colour theme.
This button opens the Change Password screen, within which you can change the password used to sign in to your account.
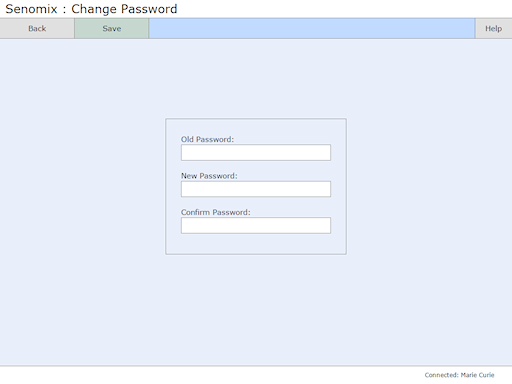
To change your password, just enter your old and new passwords where prompted and tap the Save toolbar button to update your record.
The About screen provides version and license information for your application, along with links to help you contact Senomix in the event you require assistance.
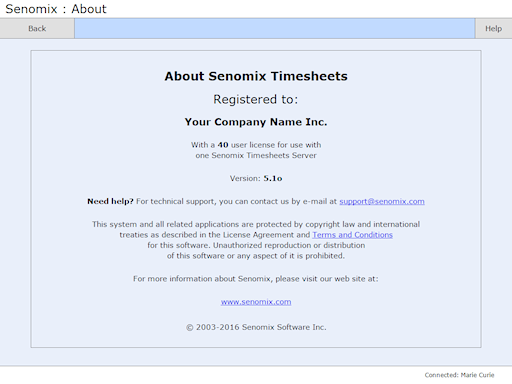
If you have any questions about your system, please feel free to contact us through the provided email link. We'll be happy to help!
The Timer screen lets you start and stop an automatic timer to record time as you work.
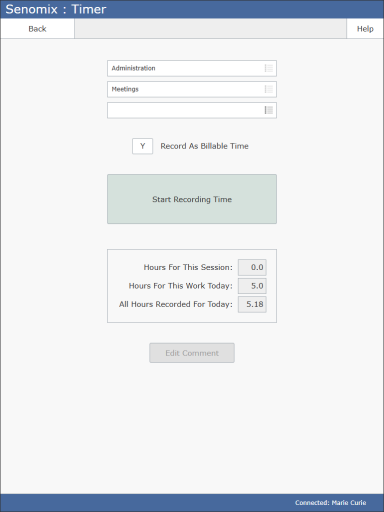
After choosing a billing code through the selector fields, you can start or stop your timer by clicking the green / red toggle button.
After starting your timer, you can leave your timer screen active, close your Senomix app, or completely turn off your mobile device. Your timer will continue to record until you return to your app and click 'stop'.
While recording time, you can add comments to your work hours by clicking the 'Edit Comment' button.
An automatic timestamp can be added to your timesheet comments by enabling that option in your Settings screen.
You can leave your timer recording for as long as you would like (up to 24 hours).
Recorded time will not be saved to your Senomix account until you have clicked the red 'Stop Recording Time' button.
If you have any questions about your mobile app or Senomix system, please get in touch at support@senomix.com.
We hope you find your Senomix app a helpful addition to your office and welcome any suggestions you might have.